Embrace the Beauty of Refinished Hardwood Floors
Embrace the Beauty of Refinished Hardwood FloorsHardwood flooring enhances any space, adding a touch of elegance and warmth to your home. However, like any surface, hardwood floors require maintenance to preserve their beauty. In this comprehensive guide, we’ll explore the process of refinishing hardwood floors, covering everything from sanding and staining to cost considerations, ensuring your floors look their best for years to come.

Section 1: The Costs and Benefits of Refinishing Hardwood Floors
Refinishing your hardwood floors is a smart home improvement project that significantly increases your home’s aesthetic appeal and value. While the cost to refinish hardwood floors varies depending on factors such as size and complexity, you can expect an average expense of $3 to $5 per square foot. Despite these costs, the benefits of refinishing are well worth the investment, as you’ll enjoy beautiful, durable, and easy-to-maintain floors that look like new.
1.1 Cost Savings and Longevity
Refinishing your hardwood floors is an easy and affordable way to improve your home’s appearance. By opting to refinish instead of replacing your hardwood floors, you save on material and installation costs. Refinished floors also have a longer lifespan, which translates to cost savings in the long run.
1.2 Increased Home Value
Hardwood floors are a desirable feature in any home, and refinishing them increases your property’s value. Potential buyers are more likely to be drawn to homes with well-maintained hardwood floors, which ultimately boosts your chances of selling your property at a higher price.
Section 2: Sanding – The Foundation for a Beautiful Refinish
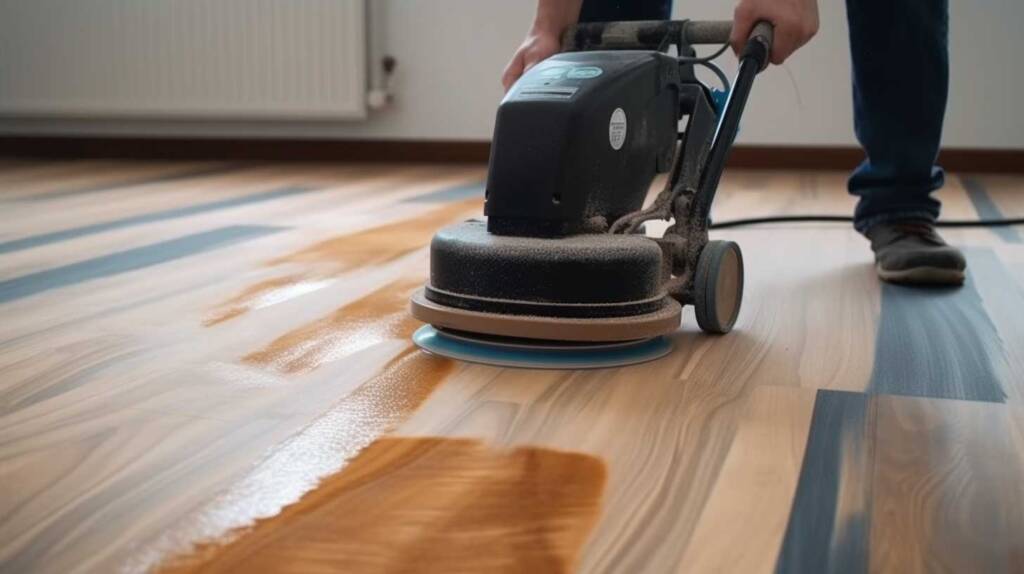
Proper sanding is crucial for achieving a smooth, uniform surface on your hardwood floors. Sanding removes the old finish, deep scratches, and imperfections, revealing the bare wood underneath. This section will guide you through the process of sanding your floors, from selecting the right sanding equipment to mastering the technique.
2.1 Choosing the Right Sanding Equipment
To sand your hardwood floors effectively, you’ll need a floor sander, sanding screens, and a sanding block for corners and edges. Drum sanders and orbital sanders are popular choices, as they efficiently remove old finishes and level the floor. When using a drum sander, start with a coarse-grit sandpaper (about 40-grit) and progress to finer grits, such as 80-grit and 120-grit, to achieve a smooth surface.
2.2 Sanding Tips and Techniques
Before you begin sanding, clear the room and remove baseboards, shoe molding, and any protruding nails. Start sanding with the grain of the wood to avoid cross-grain scratches. Don’t press too hard on the sander, and keep it moving to prevent gouges. For corners and edges, use a hand-held sanding block or an edge sander. After you’ve finished sanding, vacuum the floor thoroughly to remove all dust and debris.
Section 3: Staining and Finishing – Customizing Your Hardwood Floors
Staining your hardwood floors allows you to customize their appearance and create a cohesive look throughout your home. The key to a successful staining job is selecting the right stain color and finish for your flooring. In this section, we’ll discuss various stain colors and finishes, as well as tips for applying them.

3.1 Choosing the Right Stain Color
Consider your home’s décor and the desired ambiance when selecting a stain color for your hardwood floors. Light stains create a bright, airy atmosphere, while darker stains offer a rich, sophisticated vibe.
3.2 Applying the Stain
Before applying the stain, make sure your floor is clean and free of dust. Test the stain on a small, inconspicuous area to ensure it achieves the desired color. Apply the stain with a brush or rag, working in small sections and following the wood grain. Wipe off any excess stain with a clean rag, and allow it to dry for at least 24 hours before applying the finish.
3.3 Selecting the Right Finish
Choosing the right finish for your hardwood floors is essential for protecting them and maintaining their appearance. Some popular finish options include oil-based polyurethane, water-based polyurethane, and natural oil finishes. Each finish has its advantages, so consider factors such as durability, drying time, and sheen when selecting the best option for your floors.
Section 4: DIY Hardwood Floor Refinishing Tips and Tricks
Refinishing your hardwood floors can be a rewarding DIY home improvement project, but it’s essential to be prepared and informed to achieve the best results. In this section, we’ll share some tips and tricks for successfully refinishing your hardwood floors.
4.1 Preparing Your Space
Before you begin your refinishing project, clear the room of furniture, décor, and any obstructions. Remove baseboards and shoe molding, and cover any vents or openings with plastic sheeting to prevent dust from spreading throughout your home.
4.2 Proper Sanding Techniques
As mentioned earlier, sanding is a crucial step in refinishing your hardwood floors. Make sure to sand with the wood grain and use progressively finer sandpaper grits to achieve a smooth, even surface. Pay special attention to corners and edges, using a sanding block or edge sander to ensure a consistent result.
4.3 Avoiding Common Mistakes
Several common mistakes can hinder your refinishing project. To avoid these pitfalls, make sure you’re working in a well-ventilated area and wearing appropriate safety gear, such as a dust mask and eye protection. Also, be patient during the drying process – rushing to apply the finish or moving furniture back too soon can damage your freshly stained floors.
4.4 Maintenance and Care
Proper maintenance is crucial for keeping your refinished hardwood floors looking their best. Regularly sweep or vacuum to remove dirt and debris, and use a damp mop for deeper cleaning. Avoid using harsh chemicals or abrasive cleaning tools, which can damage the finish of your floor.
Conclusion
Refinishing your hardwood floors is an investment in your home’s beauty and value. By following this comprehensive guide, you’ll be well-equipped to tackle this rewarding home improvement project. With the right tools, techniques, and a little patience, you’ll enjoy stunning, durable hardwood floors that look like new.
Frequently Asked Questions
- How long does it take to refinish hardwood floors?
The time it takes to refinish hardwood floors depends on the size and complexity of the project. On average, sanding and refinishing a room can take 2-4 days, but you should allow additional time for the stain and finish to dry completely.
- Can I refinish engineered wood floors?
Refinishing engineered wood floors is possible, but it depends on the thickness of the top veneer layer. If the veneer is thick enough to withstand sanding without exposing the underlying layers, you can refinish the floors. However, engineered floors typically have a limited number of times they can be refinished.
- Do I need to sand down to bare wood when refinishing hardwood floors?
Sanding down to bare wood is necessary to remove the old finish, deep scratches, and any imperfections. This ensures a smooth, uniform surface for staining and finishing. Skipping this step may result in an uneven appearance and a less durable finish.
- Can I refinish laminate floors?
Laminate floors cannot be refinished in the same way as real hardwood floors. Laminate flooring is made of a composite material with a photographic layer on top, which cannot be sanded or stained like real wood. If your laminate floors are worn or damaged, replacing them is the best option.
- How often should I refinish my hardwood floors?
The frequency of refinishing your hardwood floors depends on factors such as the type of finish, the level of foot traffic, and how well you maintain them. Generally, hardwood floors should be refinished every 7-10 years. However, if you notice significant wear and tear, deep scratches, or if the finish is no longer providing adequate protection, it may be time to refinish your floors sooner.
- What is the difference between water-based and oil-based polyurethane?
Water-based and oil-based polyurethane are two types of finishes commonly used for hardwood floor refinishing projects. Water-based polyurethane is a low-odor, low-VOC option that dries quickly, allowing for faster recoating times. It is also less likely to yellow over time, making it suitable for light-colored hardwood floors. However, it may not be as durable as oil-based polyurethane.
Oil-based polyurethane, on the other hand, offers superior durability and a rich, amber hue that deepens the natural color of the wood grain. It takes longer to dry and emits a strong odor during application, but it typically requires fewer coats, providing better value in the long run.
- What is the best way to handle corners and edges during the sanding process?
Corners and edges can be challenging to sand during the refinishing process because they are difficult to reach with larger sanding equipment like drum sanders. To effectively sand these areas, use a handheld orbital sander or sand by hand with sandpaper, ensuring that you maintain the same grit progression as you did for the rest of the floor. Pay close attention to the pressure you apply while sanding to avoid creating uneven spots or gouges in the wood.
- What is the best technique for applying stain and finish to hardwood floors?
Properly applying stain and finish to hardwood floors is crucial for achieving an even, professional appearance. Start by making sure the floor is clean and dust-free. Use a high-quality brush or applicator to apply the stain evenly in the direction of the wood grain. Wipe off any excess stain with a clean rag before it dries to avoid uneven coloration.
When it’s time to apply the finish, use a brush or applicator specifically designed for floor finishes. Apply thin, even coats in the direction of the wood grain, and avoid overworking the finish as it may cause bubbles or an uneven surface. Allow each coat to dry according to the manufacturer’s recommendations before applying additional coats, and lightly buff the floor between coats to ensure proper adhesion.
- How long should I wait before moving furniture back onto my newly refinished hardwood floors?
After completing the refinishing process, it’s important to give the floor adequate time to cure before moving furniture back into place. As a general rule, wait at least 24 hours before walking on the floor with socks or soft-soled shoes, and avoid heavy traffic or moving furniture for 48-72 hours. To prevent damage to the new finish, use felt pads under furniture legs and avoid dragging or sliding heavy objects across the floor.
- How do I maintain my refinished hardwood floors to ensure their longevity?
Proper maintenance is key to preserving the beauty and durability of your refinished hardwood floors. Sweep or vacuum regularly to remove dirt and debris, and use a damp mop with a pH-neutral cleaner specifically designed for hardwood floors to tackle spills and stains. Avoid using harsh chemicals or steam mops, as they can damage the finish. Place rugs or mats in high-traffic areas to protect the floor from scratches and wear, and use window coverings to minimize exposure to direct sunlight, which can cause discoloration. By taking these simple steps, you can keep your hardwood floors looking stunning for years to come.
By following the guidance provided in this comprehensive guide, you’ll be well-prepared to undertake a successful hardwood floor refinishing project. With careful attention to detail and proper maintenance, your newly refinished hardwood floors will enhance your home’s beauty and value for years to come.